Home
ELECTROSTAR KITS
On My Workbench
Pictures 1
Pictures 2
Pictures 3
Night Shots
Aerial Photographs
Description
Loco Fleet
Wagons
Visitors Stock
Other Stock
DCC
Exhibitions
Magazine Articles
Model Rail October 2004
DEMU UPDate Issue 39
Trains Online Magazine June '05
Rail Express July 2005
Model Rail September 2005
DEMU UPDate Issue 42
DEMU UPDate Issue 43
DEMU UPDate Issue 46
Making Transfers
Loftus Road
Links
Email
Copyright © 2005-2012
James Makin
| |
Wells Green TMD | |
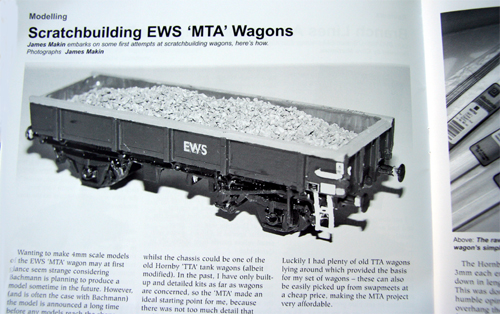
Diesel and Electric Modellers United UPDate Magazine Issue 39 'Scratchbuilding EWS MTA Wagons'
Wanting to make 4mm scale models of the EWS ‘MTA’ wagon may at first glance seem strange considering Bachmann is planning to produce a model sometime in the future. However, (and is often the case with Bachmann) the model is announced a long time before any models reach the shops. The 'MTA' ballast wagon was introduced in 1999, and consisted of a new reinforced body built on various old 'TTA' tank wagon underframes and is one of the new selection of engineering wagons that EWS have in their fleet. They are airbraked and often operate alongside MHA ‘Coalfish’ and MFA wagons to take old ballast away from engineering possessions, which are now replacing such designs as the elderly ‘Grampus’ wagons and the newer ‘Clam’s. An EWS MTA seemed the perfect choice of wagon to model; the construction would be fairly simple needing only a ‘box’ body to be built, whilst the chassis could be one of the old Hornby ‘TTA’ tank wagons (albeit modified). In the past, I have only built-up and detailed kits as far as wagons are concerned, so the ‘MTA’ made an ideal starting point for me, because there was not too much detail that couldn’t be easily replicated using materials such as styrene strip or fine wire.
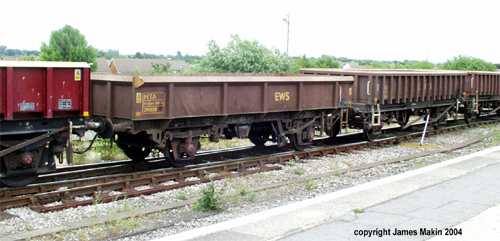
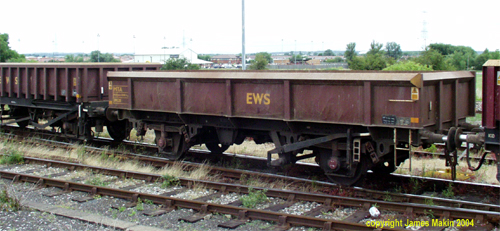
The cost of the MTA wagons was also a factor – Bachmann announced that the RRP of their wagon was to be £14.50 – so it would be quite costly to buy a large rake of these. Therefore, I set myself the goal of making a number of MTAs, which would be cheaper than the price of buying the same amount of Bachmann products when they arrived. For the prototype wagon, I did not actually have any specific dimensions of the wagons, so the measurements were made using many photographs and using objects of known dimensions to guess the true measurements of the MTA. Fortunately the pictures I took at Didcot in July 2004 enabled me to compare the height of the MTA to the MFA (so I could compare to the Bachmann model) which proved invaluable in getting the overall ‘look’ of the prototype.
Body ConstructionThe body was built upwards from the shortened chassis to provide strength during construction. Slaters ‘Plastikard’ 1.50mm sheet was used for the main walls and floor, perhaps on reflection this may have been too thick, but the last thing I wanted was the model to warp and bend during construction! It was very much a compromise between strength and being faithful to the prototype. One of the defining features of the MTA is the comparatively small amount of bodyside ribs that they have compared to designs such as MHA or MFA. These were represented using Plastruct MS-60 Square rod 1.5mm, cut down to 10mm (allowing for the triangular strip that it joins onto, the plastic also has to be cut to an angle for a smooth, clean fit against the top edge). On the ends the strip was cut to 12mm, so the bars can drop down to the level of the buffers. The bracket for the tail lamp was added to the ends of the wagon using a small piece wire. Underframe ModellingI found this part of the model harder than the body, simply because in most photographs it is quite challenging to see what is actually under an MTA as it is so dark! A piece of Plastruct MS-612 (1.5mm x 3.2mm) styrene strip was used to represent the small beams on the side with the ‘square-like’ box. Brass .45mm handrail wire was used for much of the pipework on the underframe, and for the pipes that bent round the pieces of equipment, I used fuse wire. The old Hornby plastic wheels were removed, and the axleboxes drilled through to fit Romford metal wheels and bearings.
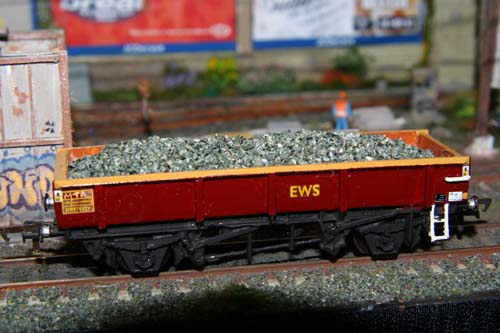
Painting the model Most of the MTAs carry EWS livery, although the MTA ‘Doorand’ wagons present a good opportunity to create and unusual wagon, as these vehicles have higher ends than the standard MTA, along with a host of other detail differences that would bring welcome variety to a block train. There are variations within the EWS livery too, whilst most of the fleet has the familiar Gill Sans font logo, there are some that have the EWS logo in the ‘Arial’ font - 395232 is a example - (same font as used on the EW&S logos on locos), so there is quite a variety to the MTAs. I painted my first MTA wagon in the standard EWS livery, representing a typical wagon of the EWS fleet, although the next ones will be made to cover all the different variations to produce an individual and varied fleet – who said that block trains on the modern railway have to be boring? Transfers from the Fox range were used – the EWS set for the ‘Turbot’ provided the main logos and little data panels for the MTA, with the TOPS panels being made up on the PC using CorelDraw, and being printed out on transfer paper, enabling me to easily create numbersets for specific wagons without having to spend hours lining up tiny numbers on the data panels!
ConclusionSo, there you have it, a finished MTA wagon. It may not be the most detailed model ever made, but it looks every bit like the prototype. At the time of writing, in September 2004, the Bachmann MTA seems like a long way off, and I have managed to create a model that will be running on the club layout long before the Bachmann model ever will. The project has not cost a huge amount, and is certainly a cheaper way to get a fleet of wagons that would normally be quite expensive. At the moment I have only built one MTA, and the total cost of plastic parts for the one wagon is well above the £14.50 mark of a Bachmann model, however, the cost is fixed – the materials bought will be enough for many more models, perhaps 10 wagons can be made from the packs of plastic bought, so as more wagons are built, the more the cost is shared between them. What makes the conversion so cheap is the Hornby TTA chassis (probably which most people would not want anymore as the new Bachmann TTA model is coming out!) is old and readily available, and which most modellers are bound to have lying around somewhere, so TTA chassis may not need to be purchased. Overall, the scratchbuilt MTA is reasonably accurate, and building a prototype before the rest of the wagons has shown me things that could be done another way – namely the way in which the floor connects to the sides. I would urge anyone to have a go at building a wagon, be it a MTA or whatever you fancy. Wagon building was an area of modelling which I previously steered clear of, but in reality was much easier than I had thought, and it is really satisfying knowing you have created something a little bit different from what every other layout has. Article reproduced courtesy of Diesel and Electric Modellers United Text copyright © 2005 James Makin
|
||